Step by Step Milk Jug Greenhouse instructions
It’s easy to start milkweed seeds in milk jug greenhouses and let Mother Nature cold stratify and germinate them for you. No need for seed heating mats or indoor lights.
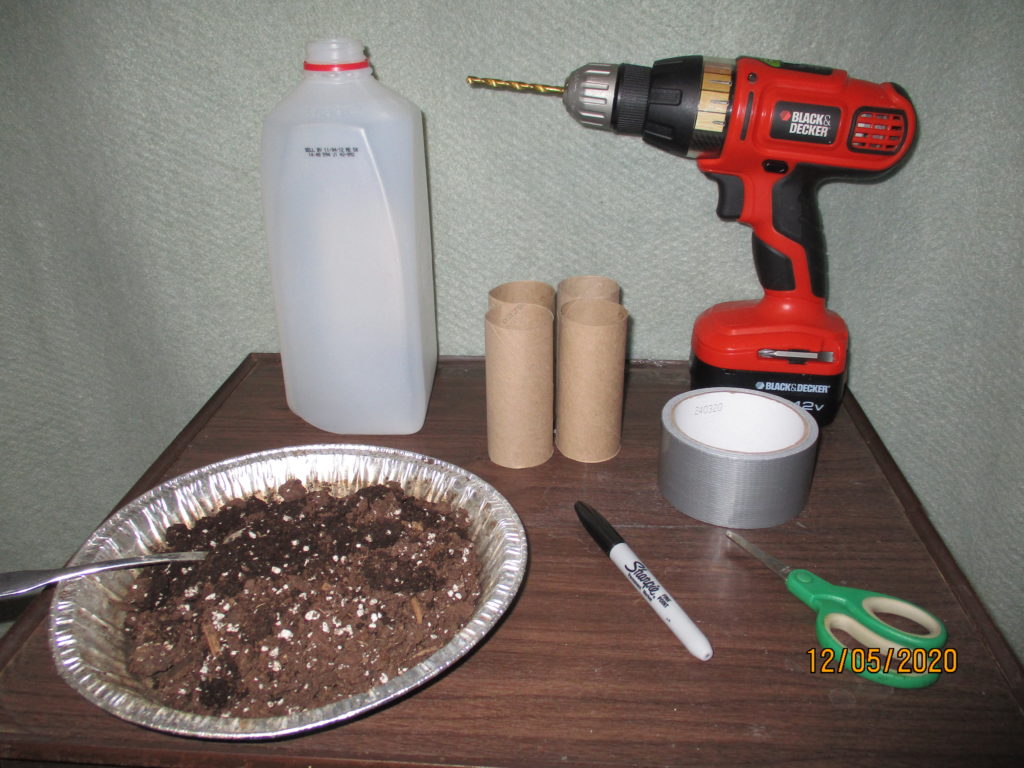
What you need
- Empty plastic milk jugs (without caps) or any other container that lets light in.
- Drill or hole punch to make holes or knife with pointy tip
- Duct tape or hole punch and twisty tie
- Potting Soil
- Scissors or box cutter
- Permanent marker
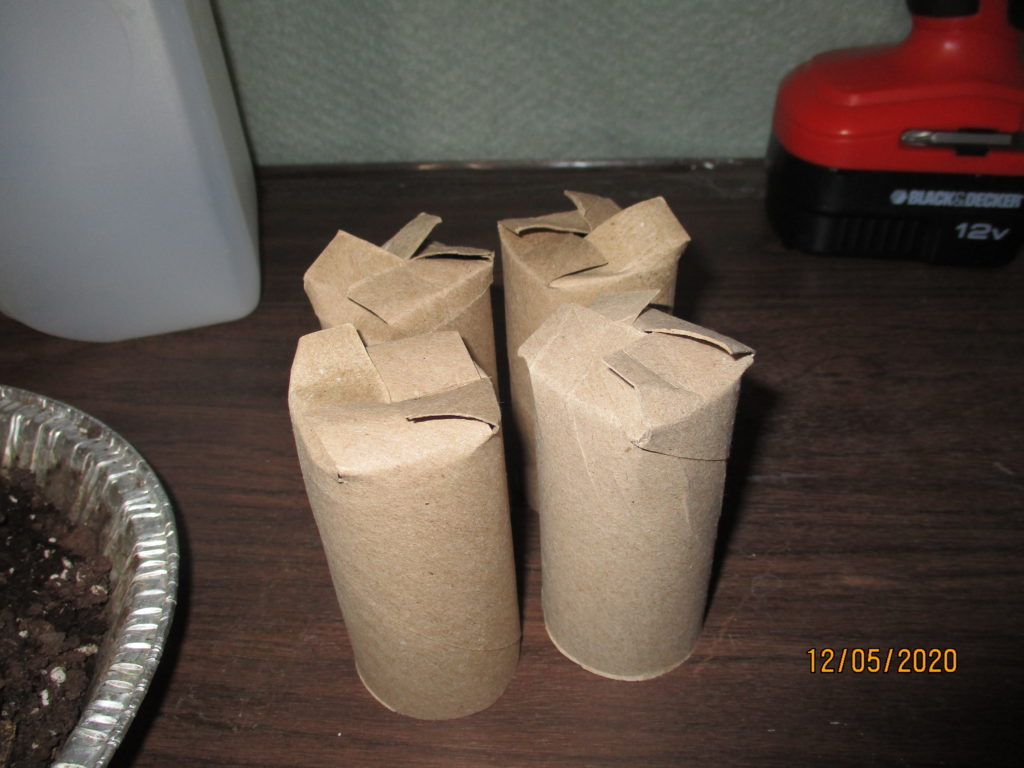
- Toilet paper tubes (optional)
- Milkweed seeds that need to overwinter to germinate
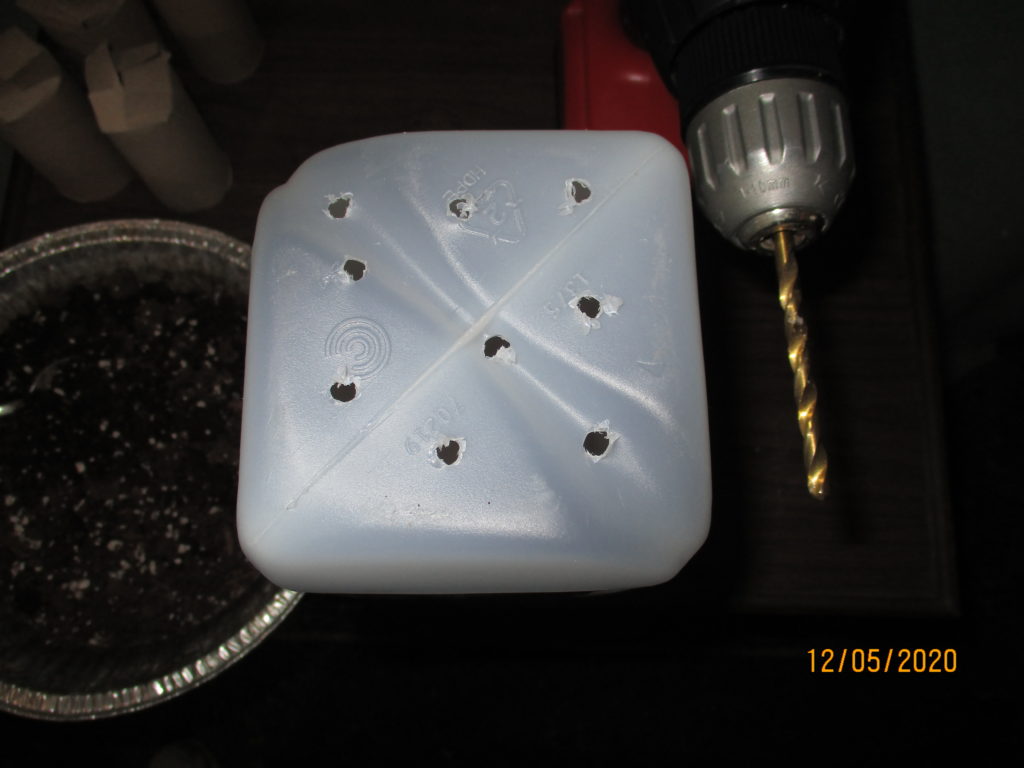
Step 1. Drill holes in the bottom of the jug or container. Or with a pointy tipped knife, (safely) stab slits in bottom.
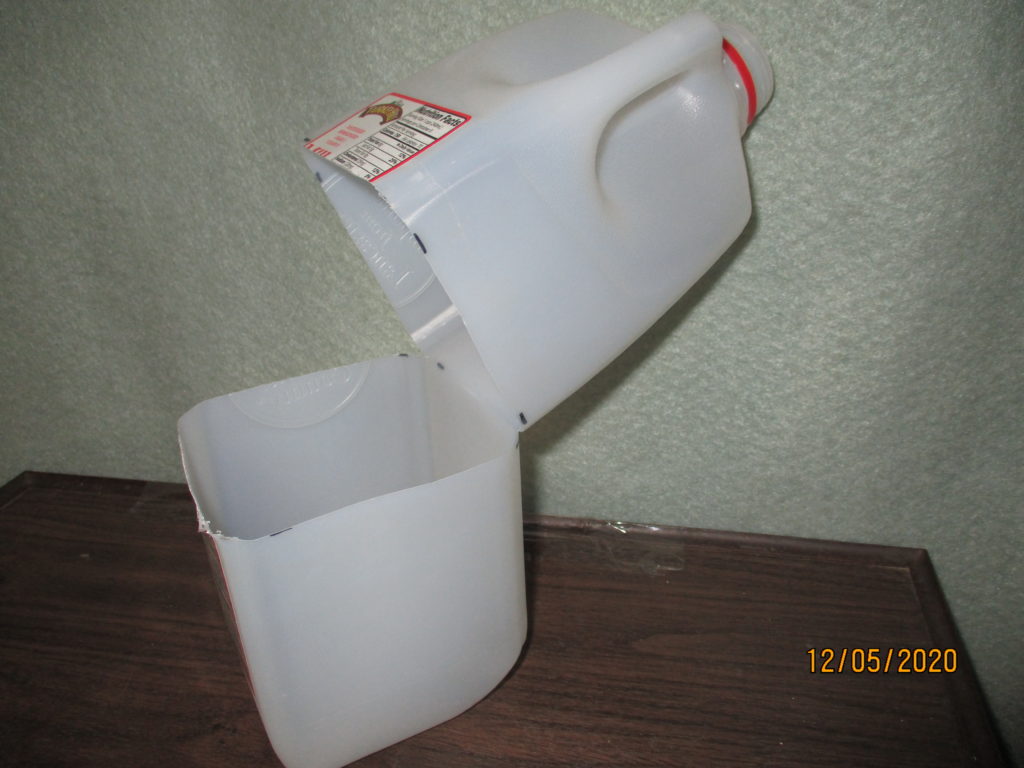
Step 2. Cut 3 sides of Milk Jug, leaving 1 side as a hinge. (Best if not the side with the handle)
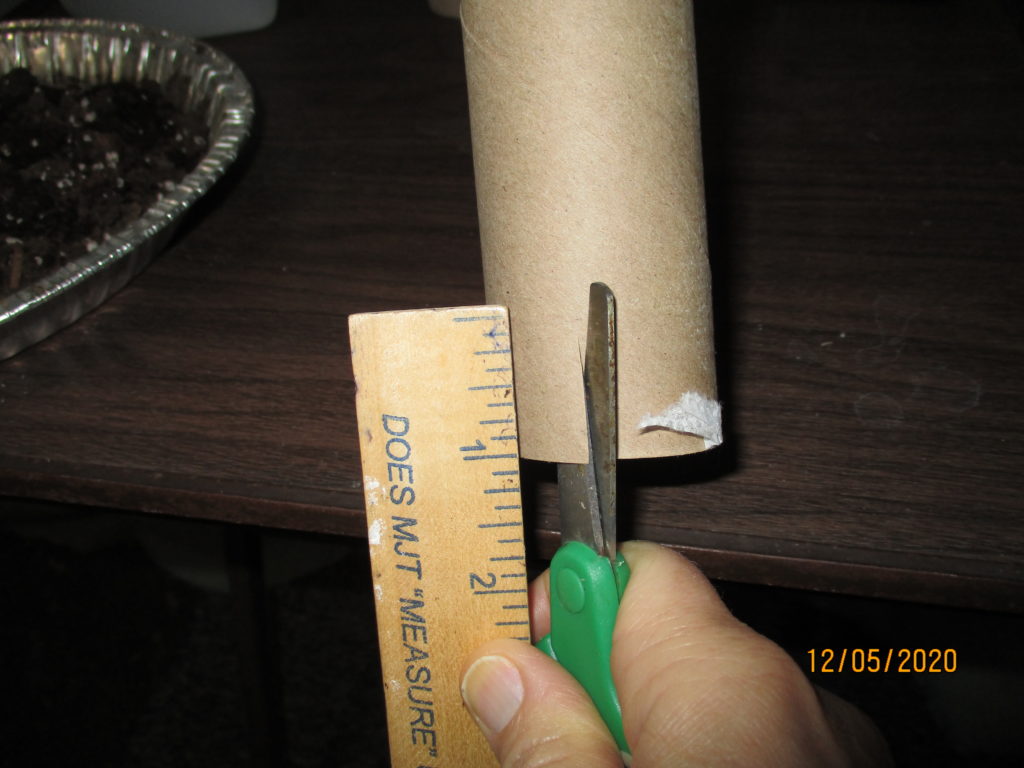
Skip step 3 if not using toilet paper tubes.
Step 3. Method 1 with toilet paper tubes takes more upfront time but, the benefits of this way is the ease of planting as the entire tube is put in the ground and no jostling of the roots so less stress on the seedlings.
Make 4 cuts approx. 3/8th inch spaced equally apart.
Step 3-A. Fold tabs down and interlace to keep soil in.
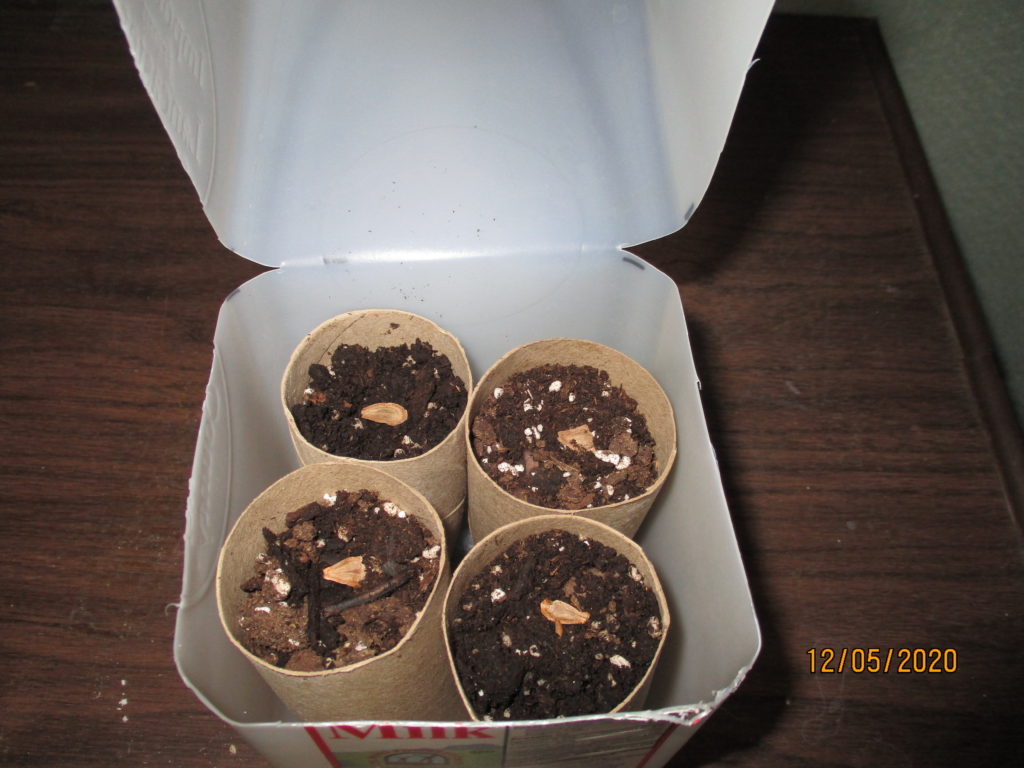
Step 3-B. Fill tubes with potting soil.
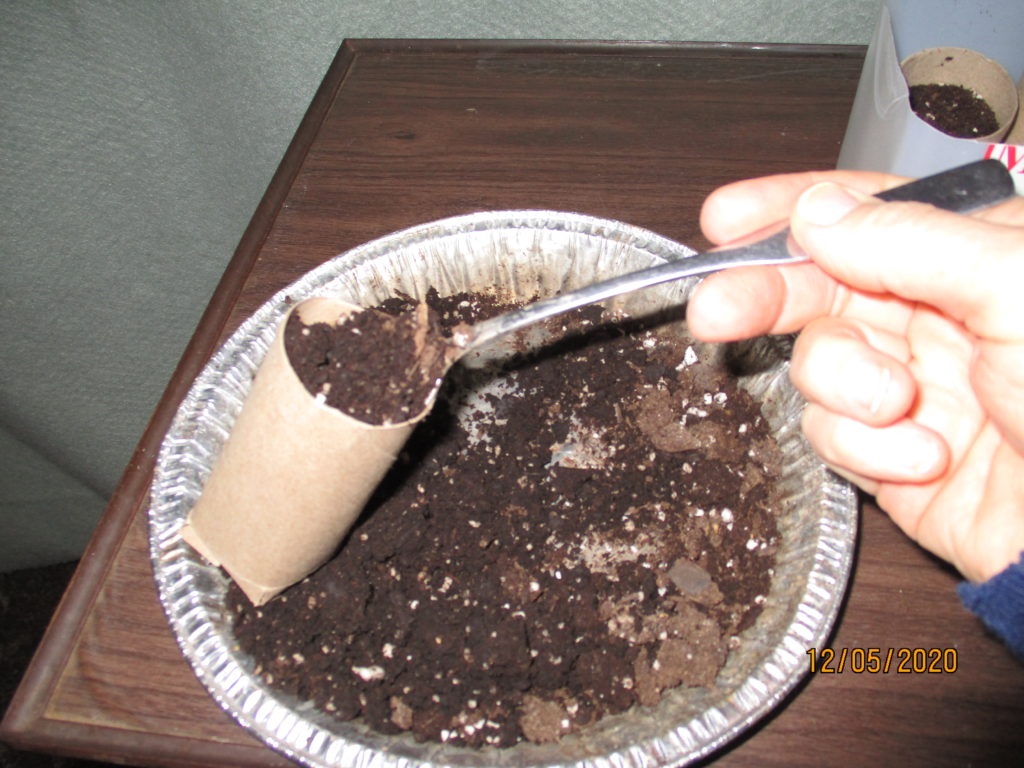
Step 3-C. Place in milk jug bottom. 4 fit inside a half Gallon. Place 1-3 seeds on top of soil in each tube. ( I only had 4 Honeyvine Seeds).
Go to step 5.
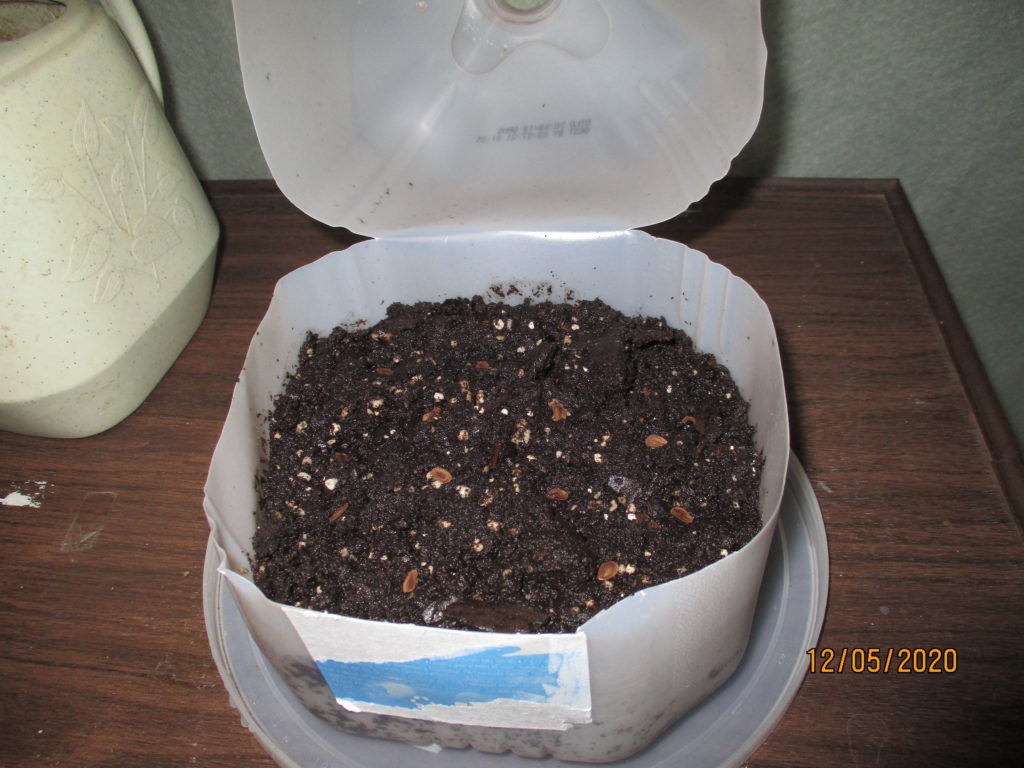
Step 4. Method #2. This is the quickest and most common method, as it doesn’t use tp tubes. Just fill Bottom half of milk jug with potting soil. Preferably one without fertilizer. Scatter seeds on top of the loose soil. Amount depends on size of seeds. Too crowed and it will be hard to transplant them without damaging roots.
Step 5. Gently but thoroughly water to moisten soil until water seeps out bottom holes.
Step 6. Duct tape shut or punch 2 holes -1 in the top and 1 directly under it on the bottom of the side opposite the hinge and use twisty tie to close. Label with permanent maker. Especially important if you are staring multiple species.
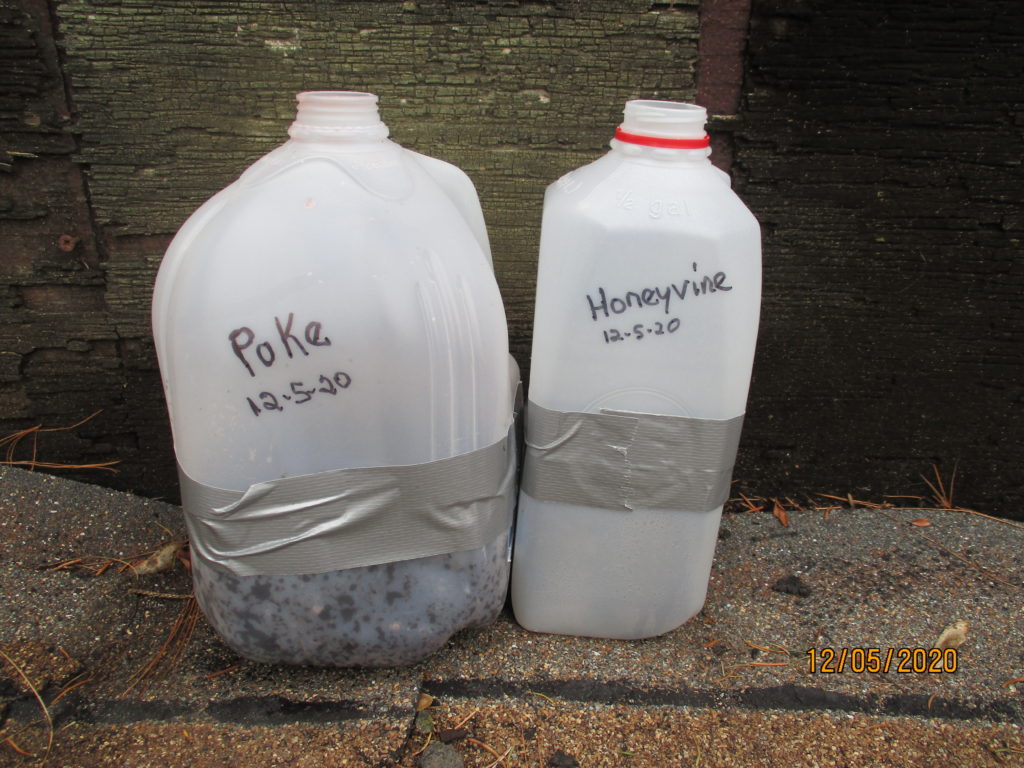
Step 7. Place outside against a sun facing wall that will allow rain to enter.
You are now done with milkweed seed germination worries. Mother Nature will take care of the rest. And because it’s in a mini greenhouse, they will sprout earlier than any milkweed seeds that are directly sown on the ground.
Now give yourself a pat on the back. You are starting a bunch of milkweed plants that will help save the Monarchs!! 🙂
Is there an easy way to find out which variety of milkweed I have before it blooms? I just went around collecting the seeds as they were opening in the ditches and the plants were already brown so I couldn’t tell which kind they were. Are the leaves different or will I have to wait to see what color the flowers are?
Thanks!
Hi Kristin,
You can get an idea of which species you have from the leaves and growth patterns but the blooms will always give you the best clue if those other methods fail. If you have a photo of those plants in question, I may be able to help identify them for you. The state you live in will have native milkweeds that will also help you narrow down the list. Here’s the Native Milkweed by State list. Cindy
I live in northern Minnesota, zone 3b. Can I use the milk jug method to cold stratify seeds and get the milkweed ready for planting? Or is it too cold? My soil in the jugs would freeze. Thanks.
Carol
Good morning Carol,
The milk jug method would be great now for your native milkweed seeds that need to have the freezes (aka Cold Stratification) to break dormancy. Not all milkweed seeds can be frozen. If however you are starting the warmer weather non-native like Hairy Balls or Tropical, that can’t be frozen, those you will need to wait until all danger of frost has passed in your area. What species are you starting? Cindy
Hi, I’m actually wondering the same thing as carol. I too am in MN.
I’d like to plant native milkweed plants. is there any that you would suggest would work the best for this milk jug method?
Hi Tiffany,
If you want to go all native for your state the list can be found here: https://www.milkweed4monarchs.org/native-milkweed-by-state/. Any of your native milkweeds can be started in the milk jugs. It’s just a way to keep the seeds safe and avoid having to buy heat mats and grow lights for starting them indoors. Plus it’s a fun project 🙂 Cindy
I live in southeast wisconsin, im new to this, i collected some milkweed seeds from the wild,.. what month is best to do this outside ??
Hi Sue,
Since the seeds are native to your area you can do this now so they overwinter and sprout when the temps start to rise in the spring. Or you can wait until early next year and set them out, as long as they have at least 30 days of cold winter to break dormancy. It’s a fun project and the seeds have a better chance of germinating inside the safety of the milk jug. Have fun 🙂 Cindy
Its spring now, what should i look for?? When do they sprout?
Hi Susie, The seedlings will germinate and sprout when the weather is consistently warm and there’s enough moisture to keep the seed shells soft. I’m in Zone 6 and will start seeing the seedlings the first couple weeks in May. You can open up the jugs to look or peek into the hole at the top. If it’s been dry, water them or set them in a shallow pie pan and keep about 14th inch of water in the bottom. Cindy
Oh no!! I did everything according to directions, all i got is weeds!; Now what?
Hi Susan,
So sorry to hear, but don’t give up yet. Are you sure those aren’t the milkweed seedlings? The potting mix you used should not have had weed seeds in it. It’s also been too dry for milkweed seeds to germinate unless you have been keeping the jug moist. Take a look to make sure the seeds are still there and mist them with water then try placing the jug in a shallow container, like a pie pan or seed starting flat. Keep 1/2″ of water in the bottom. If you think the potting mix was contaminated with weed seeds, pick the milkweed seeds off and change out the potting mix. It’s not too late to start milkweed and there’s plenty of time to try again. I wish you much success, Cindy
Hello,
So after in my milk jug that I found all weeds I gave up and purchased milkweed… I planted it in the same area and now in the last 2 weeks I’ve noticed something growing next to a couple of my milkweed plants asclepias tuberosa, and I got out my phone app plant identifier and it’s common milkweed!! so they managed to come up after all this time,!!
they’re awful close to the other milkweed what do I do ? let them grow close together or try to move them? I’m not sure what to do!
Hi Susies, You are not alone, sometimes Common will even take another year before it decides it’s ready to germinate. If the Common are still very small, moving them is aa good idea. The Asc.tuberosa will keep coming back where you started them because they have a root cluster. The Common does not have a “home base”, it’s just a network of roots that will spread out deep underground in all directions and the stalks will pop up along those roots. It’s safe to move them when they are small and once they are established you will have a lot of Common coming up all over. Hope this helps. Cindy
Thank you for such a fast response I currently don’t have a spot for it, next year in the spring I am going to be adding on to one of my flower beds and it’s going to go in there, but I don’t think I can get to it till next year …could I move it next year?
Thank you!
Good morning Catty,
If you are referring to moving the Common next year. NO! I learned the hard way. Over winter those roots are filling in a large area and you will never be able to dig up all those rope-like roots that can be 12″ under the ground. The Butterfly Weed could be relocated very early spring or after they go dormant for the year. If you want to relocate the Common, I’d suggest getting them out of there now and potting them in deeper pots until you have a place prepared. Then when you release them, they can fill the new area :). Cindy
Can you use clear plastic jugs/water bottles? Asking for a friend from a wild life center who wants to do this as a craft/activity with kids? Thanks!
Hi Angie,
I love the idea of a craft activity for the kiddos 😀 I haven’t used clear bottles but it sure would be easier to watch the seeds sprouting. Seems like that should work just fine. Absolutely worth a try. I wish them all the best, Cindy
How often should I water the plants?
Hi Linda, theoretically all the water needed should be provided by the rain, BUT, the weather has been unpredictable so when we have a dry spell I’ll water just enough to keep it moist inside the container. Open up the jug and feel if it’s dry and just give it enough so that the water runs out the bottom. Best of luck to you and thank you for helping the Monarchs 🙂 Cindy
If you use milk jugs be sure you wash them well. Last year I used some milk jugs and the slugs got in. I also used gallon water jugs and had no slug problems with them
Thank you for passing your experience along. That’s a great idea. 🙂
Do the southern florida milkweeds need cold temperatures to help germination rates?
Hi James, that’s going to depend on the individual species. Which one are you referring to?
Thanks so much! I’m clear now…this is a great idea that I’m going to try with all my seeds with the perfect warm, sunny winter spot.
Hi,
I’m confused by step 4. Are more seeds to go on the top of soil in between the toilet paper tubes?
Thanks,
Brenda
Hi Brenda, thank you for pointing that out. Step 4 is the another option if you don’t want to mess around with toilet paper tubes. It’s the most common way, just pour dirt into the container, sprinkle the seeds on top, moisten and close the container. Cindy
Is this to be done in the spring?
Hi Lisa,
Great question. You can do it now. Some people wait until Jan. or Feb. but the idea is to have them outside long enough for the seeds to have a month of freezing temperatures to increase germination rates. If however you are starting annual seeds then yes, wait until Spring so they aren’t killed by the cold. Cindy
Can this method of starting milkweed seeds in a jug work if it’s already Spring (April)? Should the seeds be placed in a refrigerator a few weeks to help them germinate using this method since Spring has arrived? Thanks in advance.
Hi Dandra, the milk jug method can be used as a mini greenhouse now if your seeds are already cold stratified. This late there probably won’t be 4 weeks of freezing temps to do it in the jug. So, if you still need to cold stratify seeds, placing them in the freezer or refrigerator, even a few weeks, will help speed up germination. Then you can still use the milk jug method to protect the seeds while they germinate and then transplant them were you want them to live.