Method #1 Germinating Milkweed seeds with seed starting kits and peat pellets. $$- most convenient.
This will be the easiest method for beginners or for those with less time to invest.

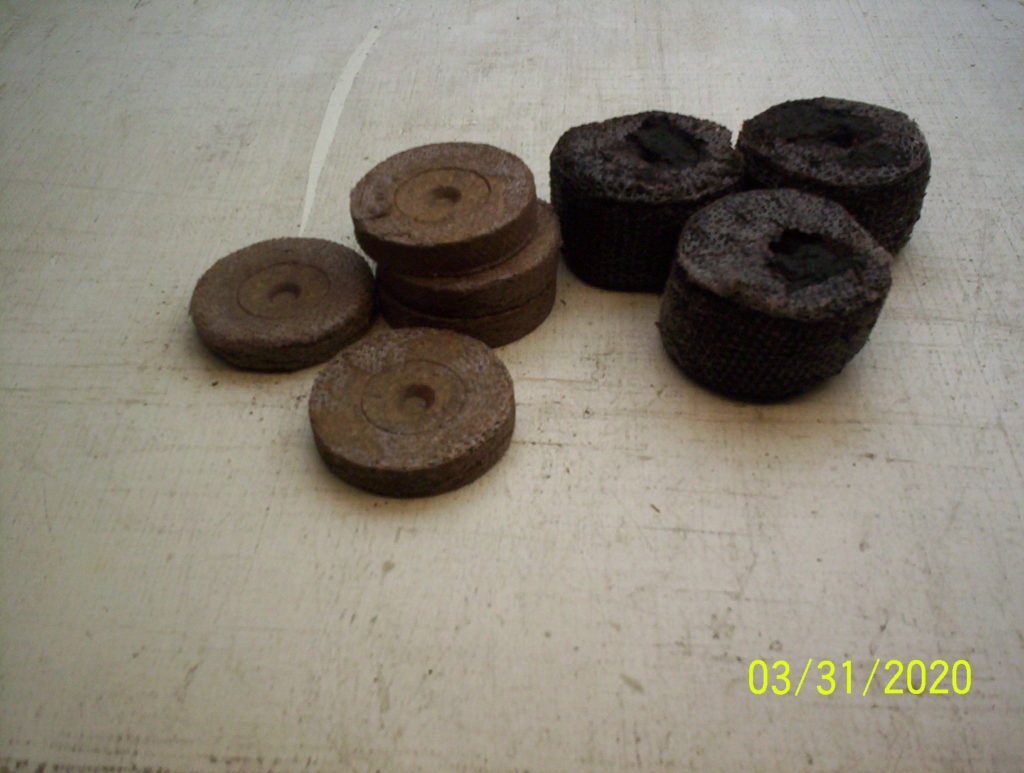
- Follow the instructions that come with your kit. The pellets need hydrated and 2 seeds can be placed on the top of each one. With a spray bottle, spritz the seeds with distilled water to moisten. Cover with clear lid, place on heat mat with light directly overhead.

- Keep light on during the day for 12 hours. Heat mat can stay on 24/7. You should see some seeds sprouting in 5-7 days.
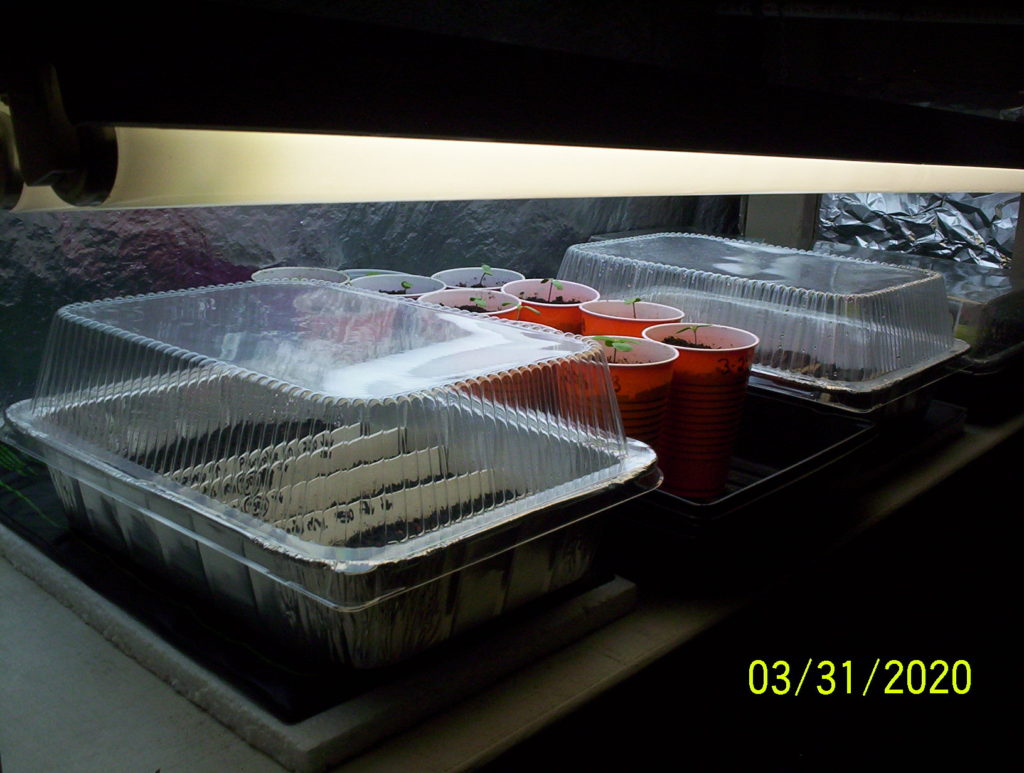
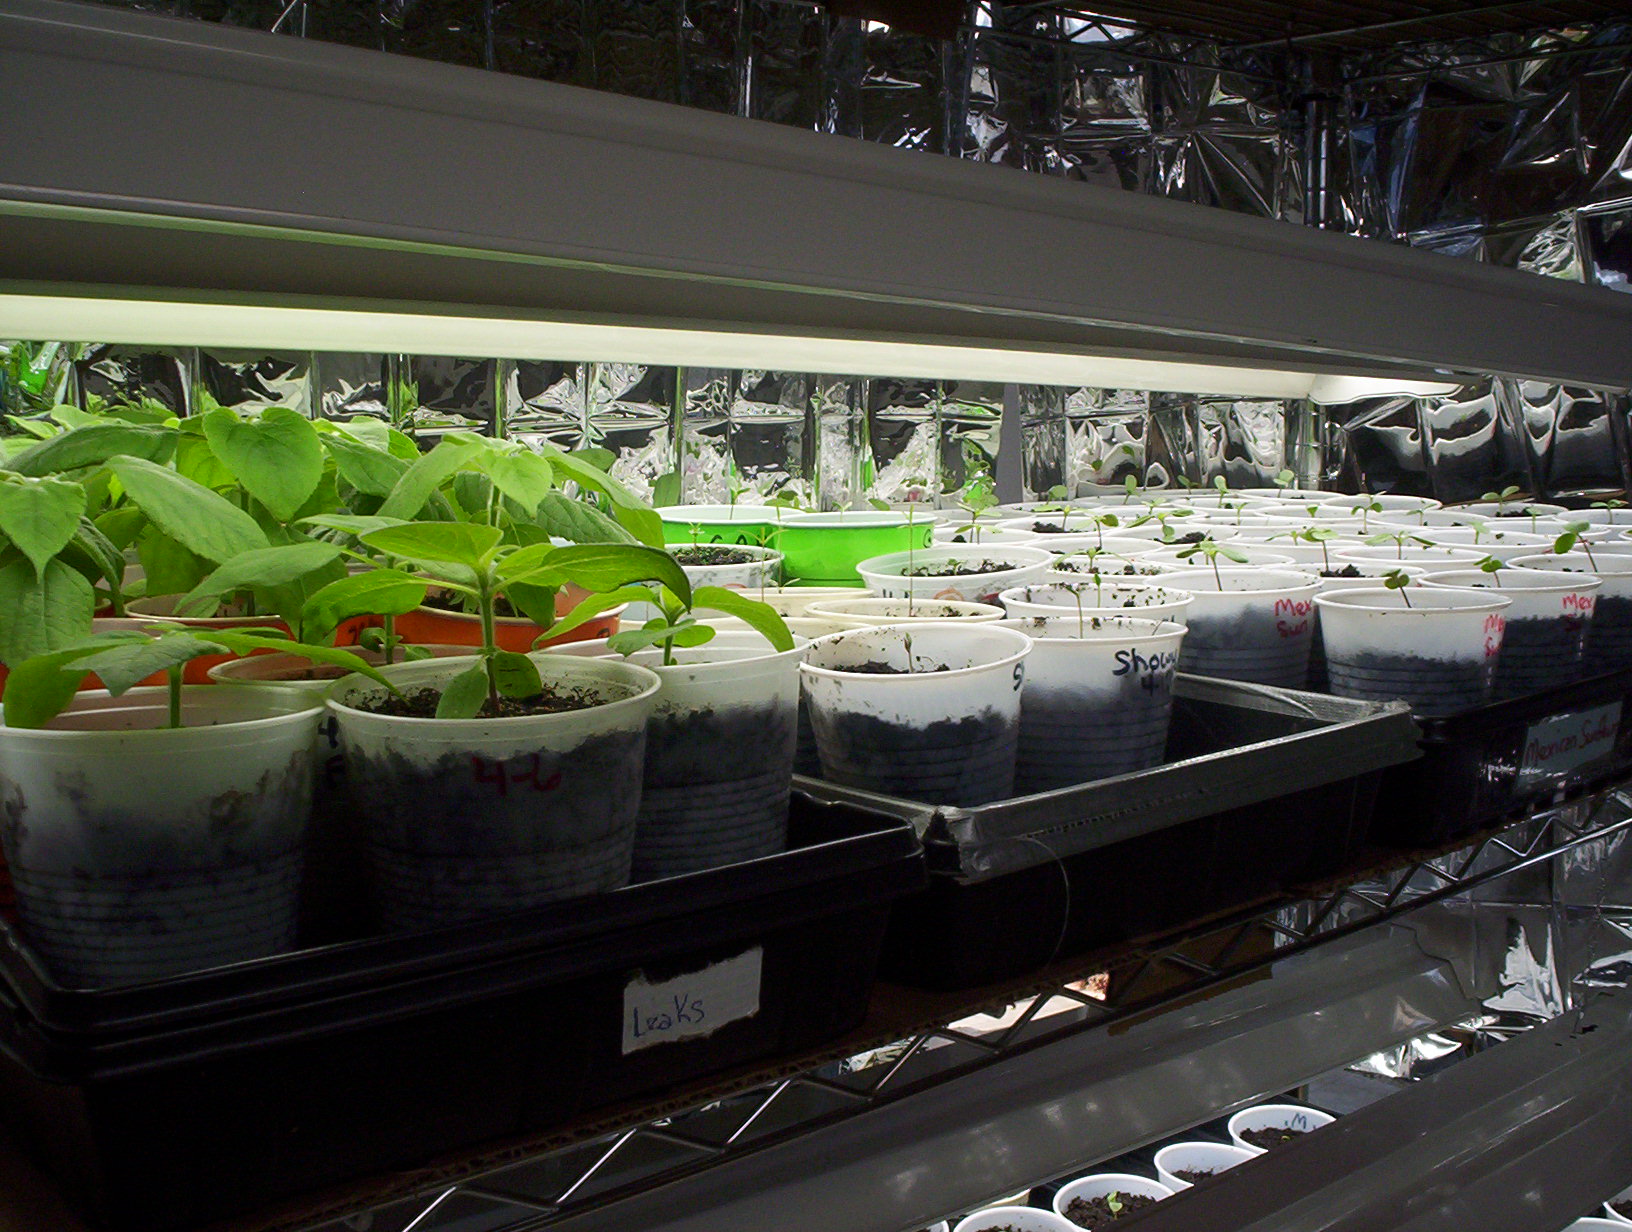
- When a sprout has both seeds leaves (cotyledons) up and apart, transplant it into a deeper biodegradable cup or the plastic 12-16 oz cups.
- Move transplanted seedlings into a separate tray without a lid and water each one thoroughly.
- Place tray directly under light so that it’s close but not touching the leaves. The light will still be on 12 hrs/day. Now no extra heat is needed overnight.
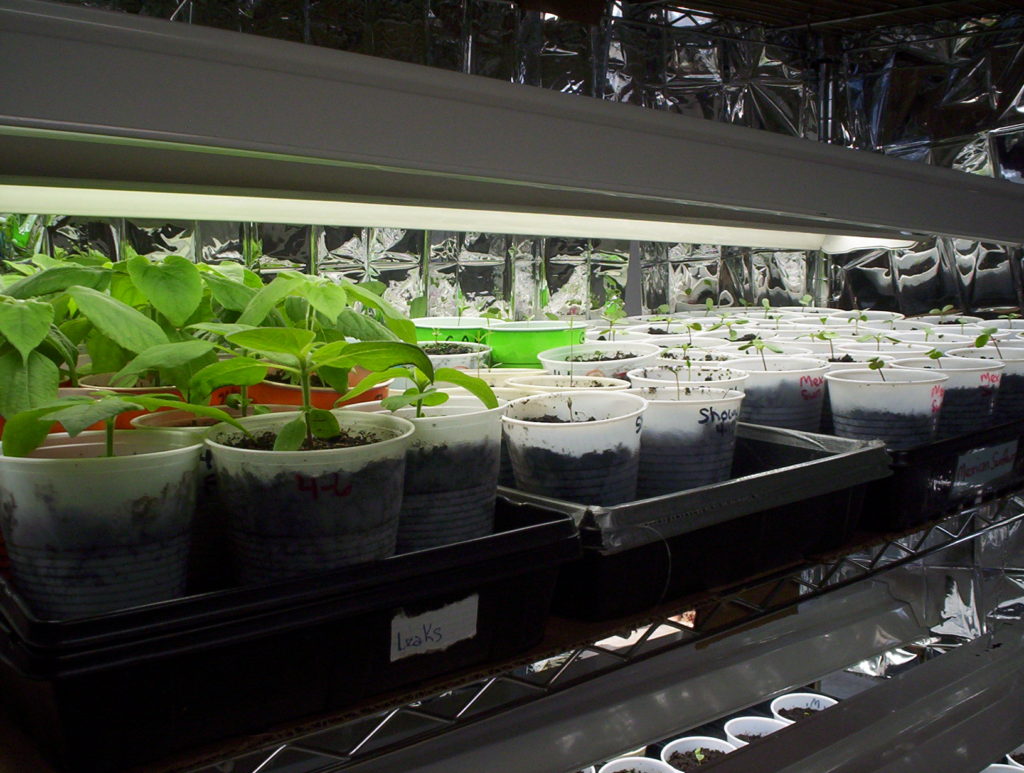
- Keep seedlings moderately watered from the bottom and raise light up as plants grow.
- Transplant outside when the ground warms.
- Congratulate yourself because you just started your own Milkweed plants! 🙂
Method #2 Germinating Milkweed with seed starter trays and cells. $-convenient.
Here were are still using kits with individual seed cells or the peat pellets with a clam-shell container. The pellets are transplanted as a whole unit so it’s easy for beginners. The individual seed cells require more hands-on work but practice makes it all easy.
Using the peat pellets and clam-shell container.


- Hydrate the pellets according to the instructions and place 2 seeds on the top of each one. With a spray bottle, spritz the seeds with distilled water to moisten. There should be no extra standing water in the bottom of the container. Cover with clear lid, place on heat mat with light directly overhead. Keep light on during the day for 12 hours. Heat mat can stay on 24/7. You should see some seeds sprouting in 5-7 days.
- When a sprout has both seeds leaves (cotyledons) up and apart, remove the whole pellet from the covered tray, remove the netting and transplant it into a deeper biodegradable cup or the plastic 12-16 oz cups.
- Move transplanted seedlings into a separate tray without a lid and water each one thoroughly.
- Place tray directly under light so that it’s close but not touching the leaves. The light will still be on 12 hrs/day. Now no extra heat is needed overnight.
- Keep seedlings moderately watered from the bottom and raise light up as plants grow.
- Transplant outside when the ground warms.
- Congratulate yourself because you just started you own milkweed plants!
Using the individual seed cells and clam-shell containers.
- Fill each cell with potting soil. Place 2 seeds on the top of each one. Water each cell to moisten soil but not so much that there is water in the bottom of the container. Cover with clear lid, place on heat mat with light directly overhead. Keep light on during the day for 12 hours. Heat mat can stay on 24/7. You should see some seeds sprouting in 5-7 days.
- When a sprout has both seeds leaves (cotyledons) up and apart it’s time to transplant it to a deeper cup. Using 2 forks- push a fork down between the soil and one side of the cell. Push the other fork between the soil and cell on the opposite side. Push the handles away from each other and lift the entire plug out of the cell and transplant into a deep biodegradable cup or plastic 12-16 oz cup.
- Move transplanted seedlings to a separate tray without a lid and water each one thoroughly.
- Place tray directly under light so that it’s close but not touching the leaves. The light will still be on 12 hrs/day. Now no extra heat is needed overnight.
- Water moderately from the bottom and raise light up as plants grow.
- Transplant outside when the ground warms.
- Congratulate yourself because you just started you own milkweed plants!
Method #3 Germinating Milkweed in bulk with less expensive-free materials.- Most hands on and more time investment.
This method is for germinating large quantities of seeds in a short period of time and using very little space. It is the most hands-on and requires a larger time investment. Not the easiest for beginners but the costs are much lower.
Method # 3.1 Clipping & water germination
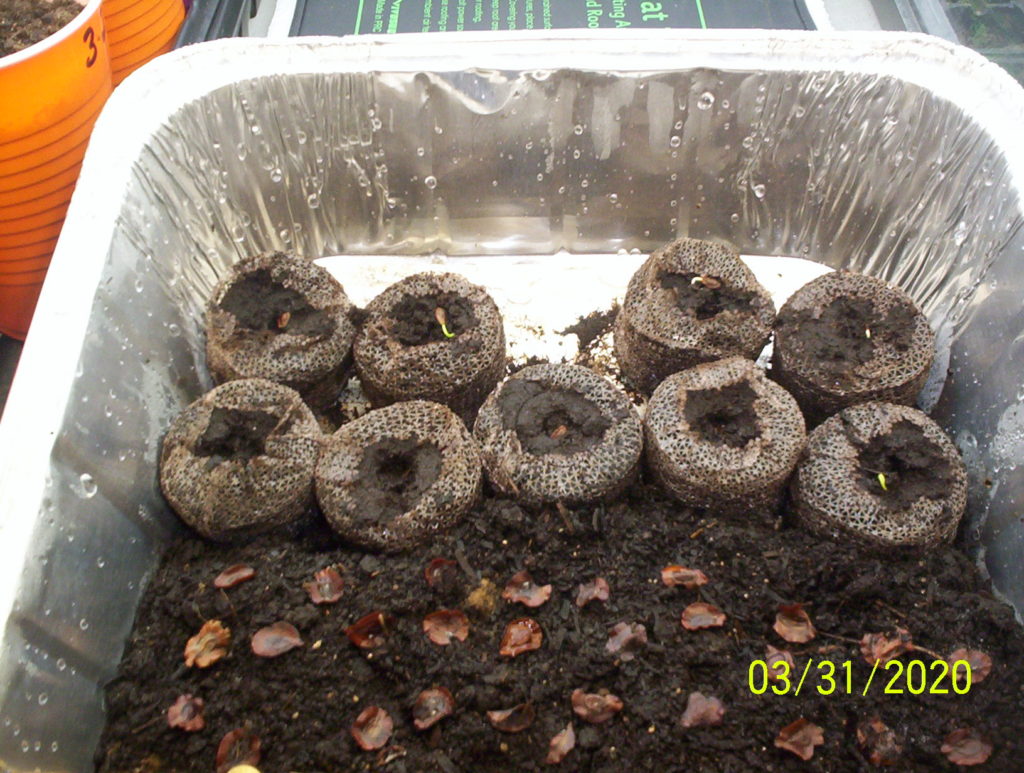
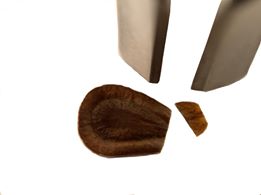
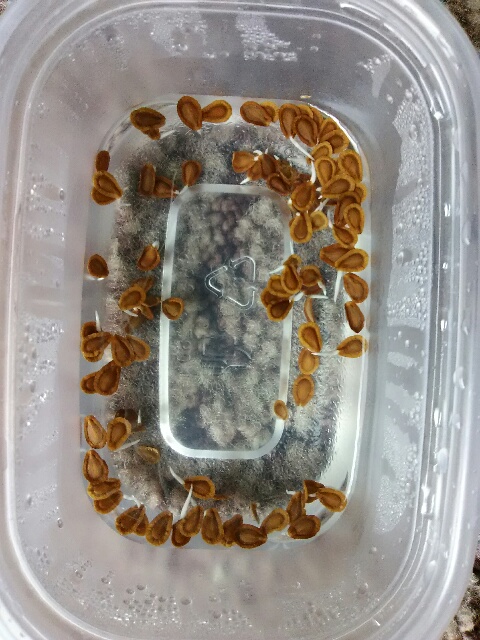
Clipping and water germination has proven to be a total game changer in getting hard to start seeds to germinate quickly. With small scissors or fingernail clippers, snip off a small sliver of the pointy end (where the root emerges). Immediately place clipped seeds in warm water on top of the seed heating mat for at least 24 – 48 hrs and then pour out into the clear domed container. OR leave in the warm water until the seeds start to sprout roots. Change the water daily. Then pour into the domed container. Jump to #3 in the next method.
Method # 3.2 Terrarium style germination
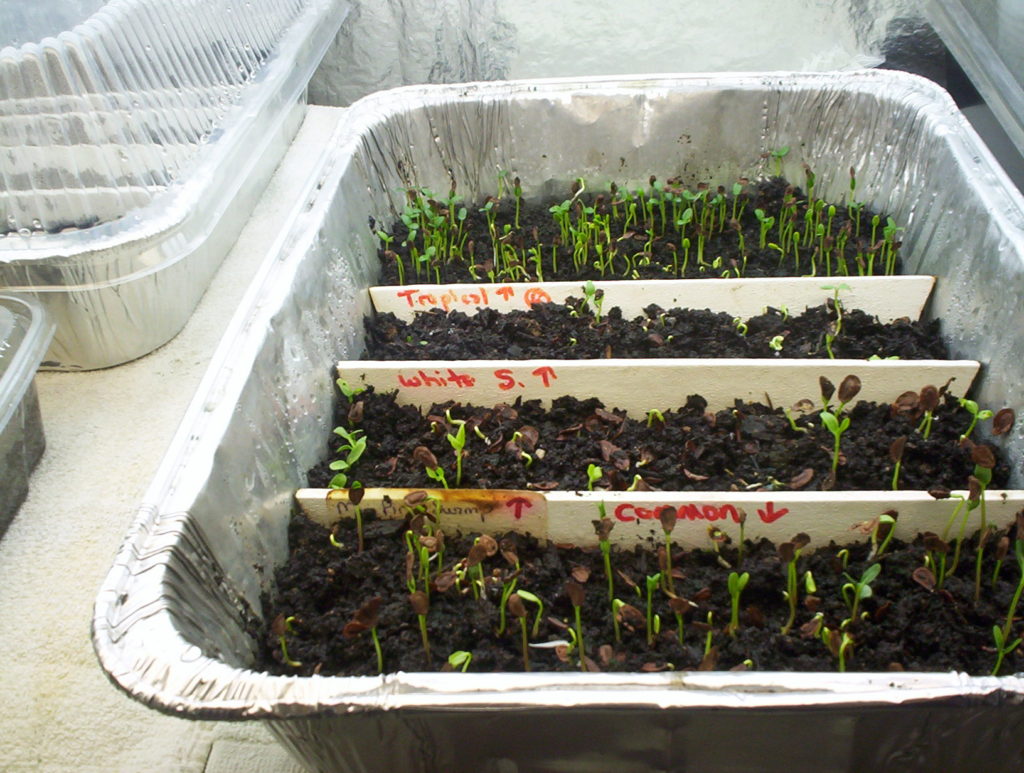
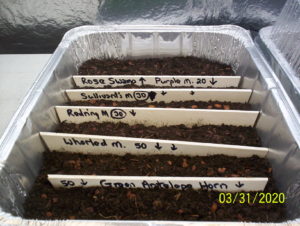 Now that you have your supplies it’s time for the fun stuff. Fill your clear domed containers with 1.5″ of potting soil.
 - Sprinkle the milkweed seeds on the top of the soil. With a spray bottle filled with distilled water, start to dampen the seeds and soil. You don’t want standing water, only slightly damp soil. Close the lid to keep the humidity inside.
 Place container on top of the seed heating mat and plug it in. Lower the light so that it is as close as possible without melting the plastic dome lid. Keep the light on for up to 16 hours a day and turn off overnight. The seed heating mat will need to stay on all night but during the day, if the heat from the light warms the area up to 75 -80 deg. F then the mat can be turned off. In 5-7 days you will already have your first sprouts!

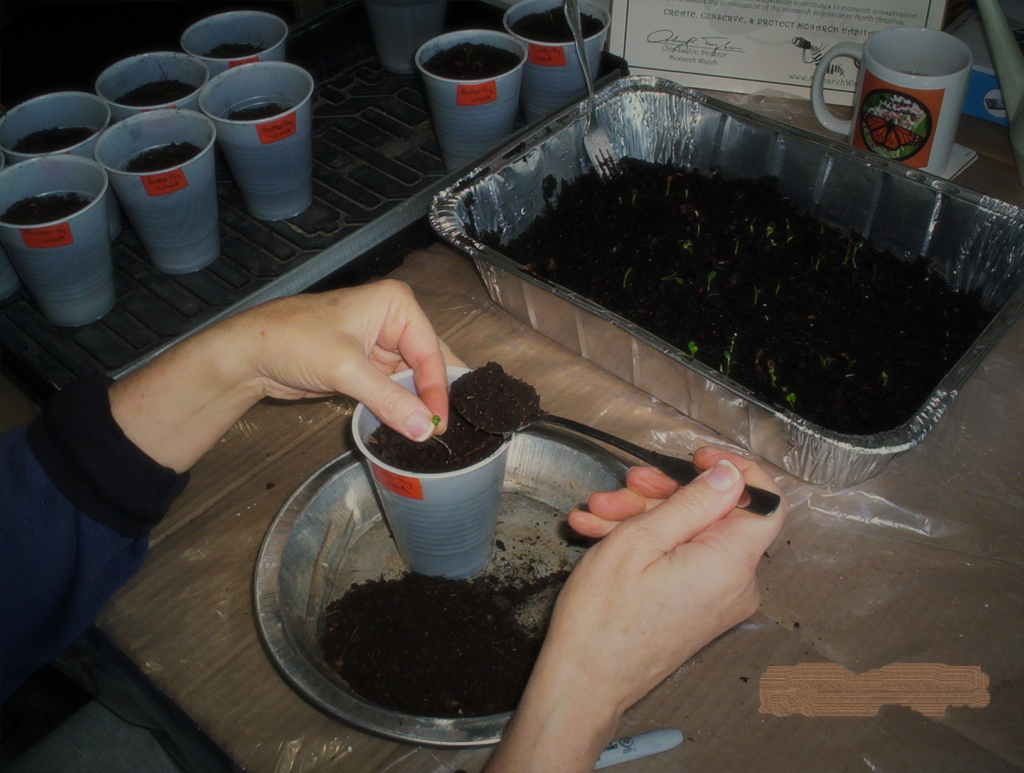
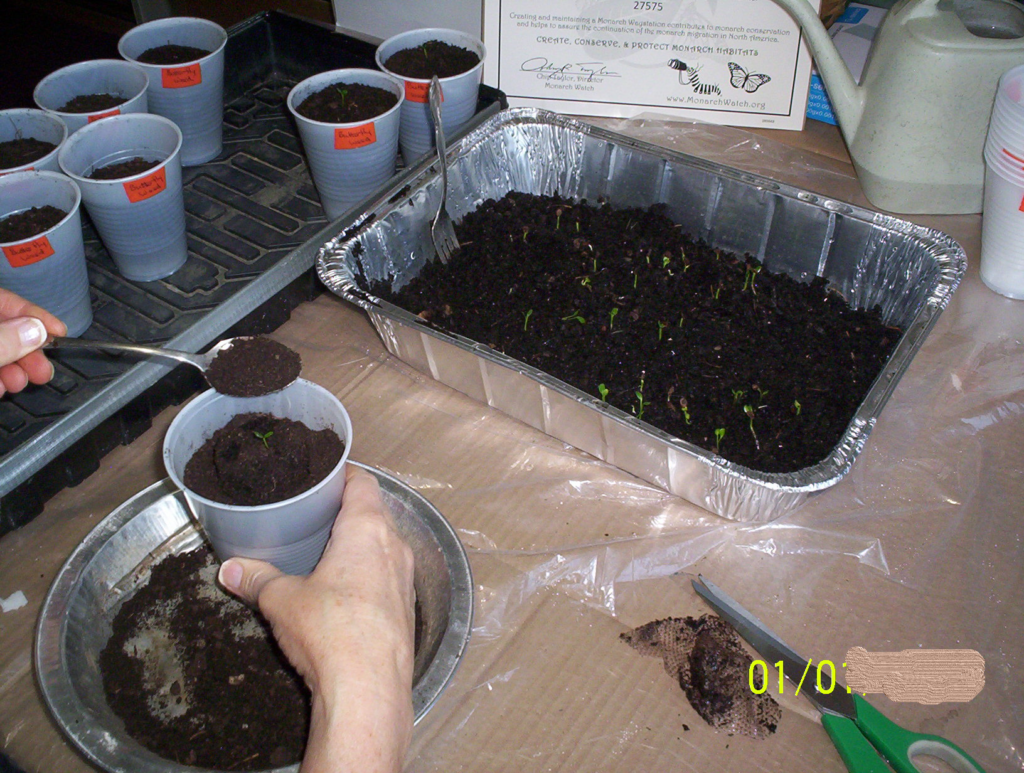
Milkweed Sprouts - When the seed leaves (cotyledons) are up and apart this is the time to transplant it to a larger pot or cup. The seed coating may still be stuck to one of them but let it be, it will fall off and trying to pick it off may tear the little seed leaf. At this stage the roots can already be 2″ long. So I use a fork to gently go down beside the sprout and slightly lift the soil while holding the stem and lifting the seedling out of the container.

- Without moving your light grip on the stem, hold the seedling over the empty cup, at the depth where you want it to end up, and start filling the cup with soil using a spoon. By not moving the seedling during the filling process, the root will fall downward, as the dirt fills the cup. Once the cup is mostly filled then you can remove your fingers and push the soil down around it.
- Place transplanted seedling into a separate tray directly under the light. Water gently until you see it flow out the bottom.
- As the plant grows continue to lift the light up to keep it just off the leaves.

Milkweed Seedlings - Every few days check to see if there are more seedlings ready to transplant. The good news here is that over the next 2 weeks new ones will continue to sprout and not sprout all at once.
- Spray the seeds with water as the soil starts to dry out.
- Now give yourself a pat on the back because YOU just started a milkweed plant that will help save the Monarchs!